Tuesday, August 10, 2010

Dying Sunflower #9 HDR


Only a few sunflower pictures to go!  Here is #9 again, in HDR, with more detail in the yellow petals.    

Camera: Nikon D700 
Lens: AF NIKKOR 180mm f/2.8D IF-ED "Leni lens"
Exposure: ISO 200, f/22 @ 1.3s, tripod (Gitzo Basalt GT2830 and Gitzo GH2781QR ball head)
Lighting: Window light 
Location: Grand Center Artist Lofts GPS
Processing: Lightroom 3, Photoshop CS5

Sunday, August 8, 2010

Dying Sunflower #3, HDR

Dying Sunflower #3, HDR Version

Getting a sense of the extra control of mid-tones that HDR Pro gives, I had to go back to look at earlier sunflower posts and compare them to HDR images.  "Dying Sunflower #3" received the same workflow except the HDR step.   
Dying Sunflower #3, Original Post


While the difference between these two isn't huge, I think the HDR version is better.  The mid-tone shading has much more detail and subtlety and the highlight separation is much improved.  There is something going on here beyond better dynamic range, but what is it?

I read an article in "LensWork" recently by architectural photographer, Scott Hendershot, who is making the transition from large format to digital.  He uses a combination of HDR and panorama techniques to build up an image.  For instance most of his pictures consist of nine HDR images stitched together as a 3x3 panorama, meaning that he takes between 27 and 45 images, depending on the HDR brackets.  Hendershot claims that HDR gives you improved resolution and color depth, making it like using a higher resolution sensor.

Now I can see what Hendershot means.  The D700 has a 12 megapixel sensor, so the three image bracket would be about 27 megapixels after cropping to 1:1. The HDR image above in terms of resolution and tonal range approaches the quality of single shot pictures made with Hasselblad's budget model H3DII-31.

One downside to HDR - it makes sensor dust really "pop".  

Camera: Nikon D700 
Lens: AF NIKKOR 180mm f/2.8D IF-ED "Leni lens"
Exposure: ISO 200, f/22 @ 0.6s, tripod (Gitzo Basalt GT2830 and Gitzo GH2781QR ball head)
Lighting: Window light 
Location: Grand Center Artist Lofts GPS
Processing: Lightroom 3, Photoshop CS5, HDR, Nik Color Efex Pro

Dying Sunflower #1 in HDR


Based on the my adventures in HDR, I thought it would be fun to revisit my first sunflower picture and apply the technique.  Above is the final result.  I thought the intermediate steps and a discussion of the film analog might be of interest.  

The "Metered Exposure" is the middle shot of a +/- 0.7 EV bracket automated by the camera.  This is the starting point without corrections.  With transparency film, the bracket would have been 1/3 stop based on an incident light meter reading, and color would have to be corrected in camera.  

The "HDR Output" is the result of  processing all three exposures through the Photoshop CS5 Pro HDR action.  This is one of the most improved features of Photoshop.  My only criticism is that all the presets are rather gaudy, so I made my own starting point.  The HDR workflow will always need some levels adjustment to get good mid-tone and dark separation.  The film analog here would be to create one or more highlight masks to use with the single best exposure.         

Straight Metered Exposure
HDR Output w/levels adjustment

The HDR output still felt a little cheerful, so I ran it through the Bleach Bypass process in Nik Color Efex Pro.  With film, the bleach bypass is exactly what is sounds like - you skip the bleach step, which increases contrast in the mid tones and de-saturates the color.

To get the same look on film, I would have started medium format or 4x5 fine grain transparency stock, like Fujichrome 50.  I don't think 35mm film, especially with Kodachrome going extinct, is capable of the resolution or long shoulder and toe on the gamma curve.  

Camera: Nikon D700 
Lens: AF NIKKOR 180mm f/2.8D IF-ED "Leni lens"
Exposure: ISO 200, f/22 @ 0.6s, tripod (Gitzo Basalt GT2830 and Gitzo GH2781QR ball head)
Lighting: Window light 
Location: Grand Center Artist Lofts GPS
Processing: Lightroom 3, Photoshop CS5 HDR Pro, Nik Color Efex Pro

Saturday, August 7, 2010

Vase #1 - HDR


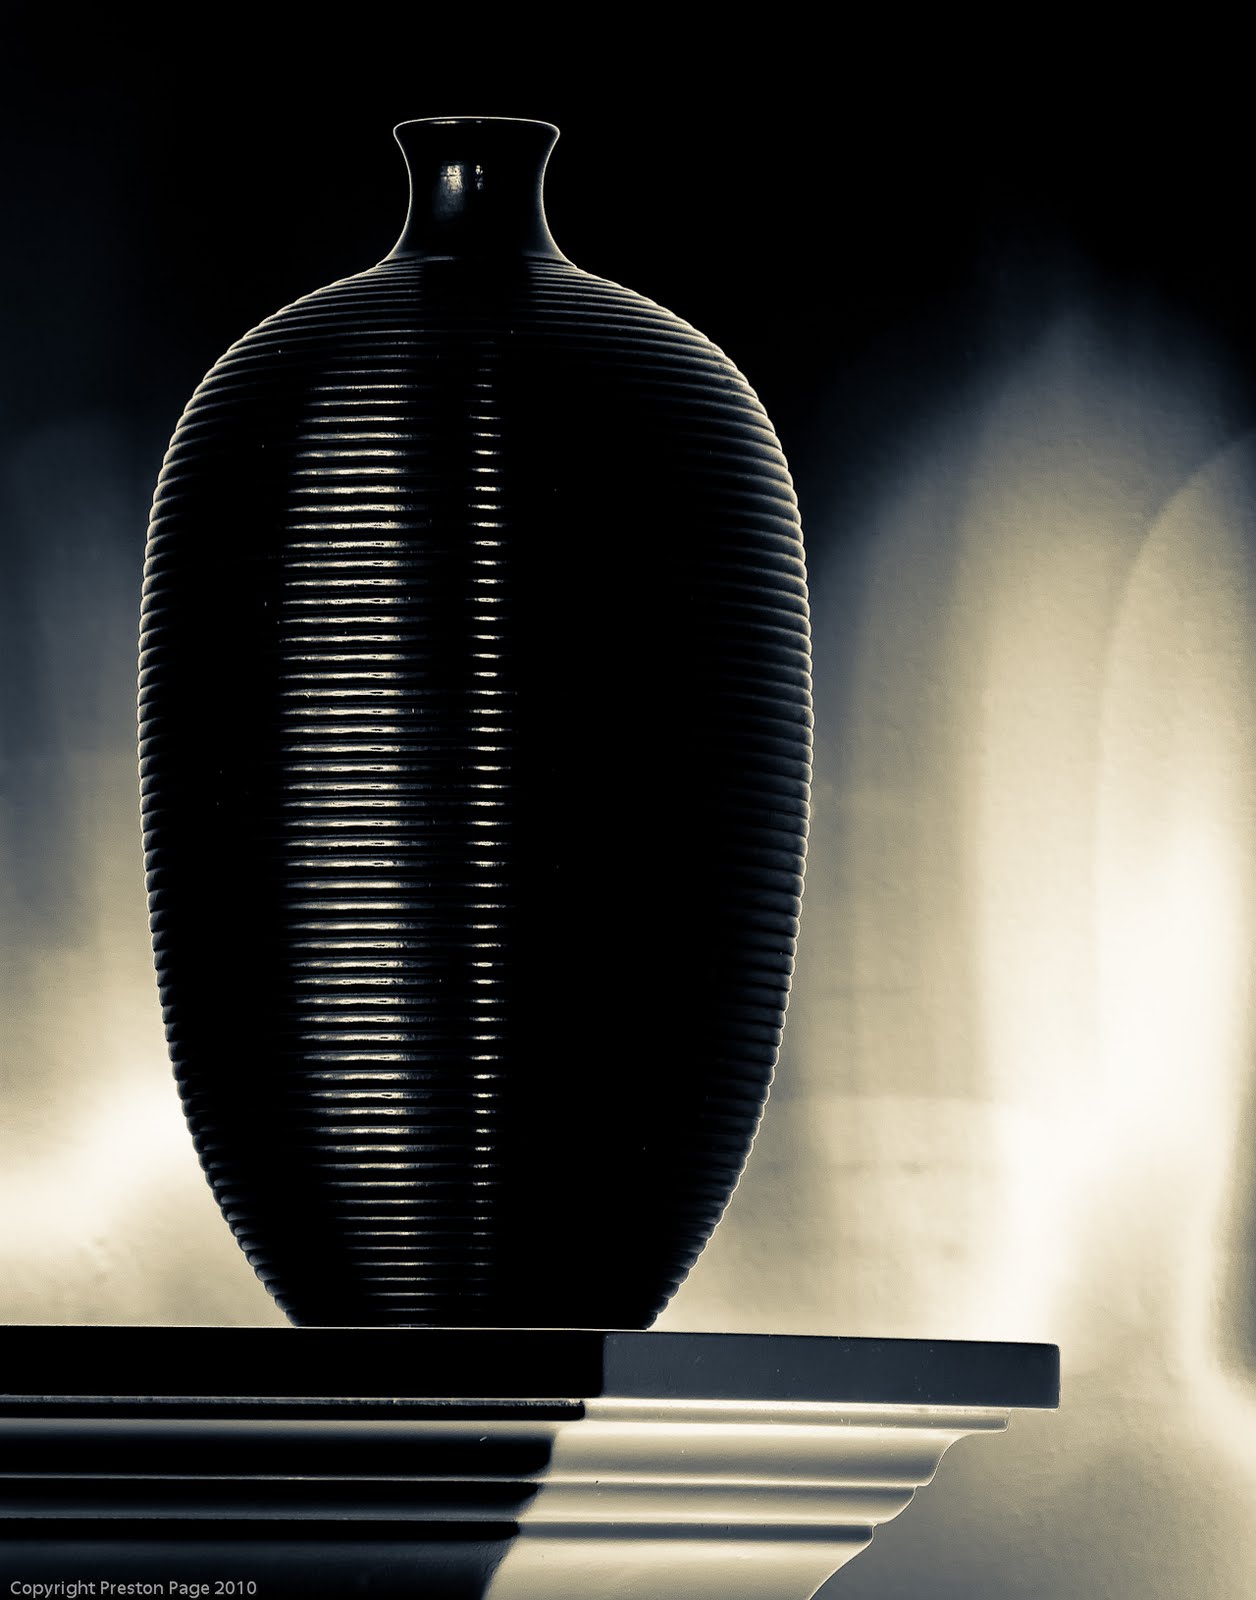
Based on my further adventures in HDR, I wanted to come back to the vase I shot earlier today.  My first impression was  that the default Photoshop HDR Pro image was way too flat to use as-is, which I think will always be true.  For my first riff on processing this image, I used solarization to pump up the contrast.  For this second effort, I ran the originals through the HDR process again, using my new custom preset, then tweaked the tone curve and applied a sepia/blue develop preset.  

Camera: Nikon D700 
Lens: AF NIKKOR 180mm f/2.8D IF-ED "Leni lens"
Exposure: ISO 200, f/11 @ 2.5s, tripod (Gitzo Basalt GT2830 and Gitzo GH2781QR ball head)
Lighting: Window light 
Location: My house
Processing: Lightroom 3, Photoshop CS5 HDR Pro

Dying Sunflower #11 - HDR


When I was shooting the dead sunflower series, my original intent was to make High Dynamic Range images, so I bracketed each shot +/- 0.7 stops for a total of three captures.  The setup is simple: the flower is sitting in front of a piece of black foam core, lit from the left by skylight from a window and fill light on the right from a Flashpoint 5500K fluorescent bank.  I let the camera determine the exposure and bracket for me.

So today, I finally went through a couple of the Photoshop HDR Pro tutorials that show how to go from Lightroom to Photoshop HDR Pro to Lightroom.  The first few attempts had long tonal range, but looked really flat.  For my pictures, Photoshop HDR presets were very unpleasant.  After some trial and error, I finally hit on a combination of settings and an approach that I like that serves as a good starting point in Photoshop with final polishing in Lightroom.  The HDR technique brought out quite a bit of detail in the black foam core, so I pulled down the "darks" curve in Lightroom until they dropped out.


To see what a monochrome version looks like, I just applied my cyan/sepia split tone develop preset.  I really like how silvery this looks.  If I had to choose one, for this subject, I might lean toward the monochrome.

Camera: Nikon D700 
Lens: AF NIKKOR 180mm f/2.8D IF-ED "Leni lens"
Exposure: ISO 200, f/22 @ 0.6s, tripod (Gitzo Basalt GT2830 and Gitzo GH2781QR ball head)
Lighting: Window light 
Location: Grand Center Artist Lofts GPS
Processing: Lightroom 3, Photoshop CS5 HDR Pro, 

Dying Sunflower #9


One more for the series.  As I am pixel peeping, the sharpness and resolution delivered by the "Leni" lens is really outstanding.  I was not expecting performance this good for close-up work like this.  As with the others in the series, the flower is sitting in front of a white wall in the studio, side lit by a window about six feet away.  I used Nik Color Efex Pro Bleach Bypass effect to reduce saturation and increase contrast.

Camera: Nikon D700 
Lens: AF NIKKOR 180mm f/2.8D IF-ED "Leni lens"
Exposure: ISO 200, f/22 @ 0.6s, tripod (Gitzo Basalt GT2830 and Gitzo GH2781QR ball head)
Lighting: Window light 
Location: Grand Center Artist Lofts GPS
Processing: Lightroom 3 and Nik Color Efex Pro

Solarized Vase #1


While working through a tutorial about using using Photoshop CS5's HDR pro, I took some bracketed pictures of this vase sitting in our basement.  As an HDR experiment, it was interesting because I could pull out all the detail in the black vase without blowing out the white of the mantle it is sitting on.  So this picture started with HDR output from Photoshop.  I liked the simple shape and composition, but the color image was too flat and not very graphic, so I used Nik Color Efex Pro to solarize the image, then converted it to gray scale and used a sepia and blue split tone in Lightroom 3.

Camera: Nikon D700 
Lens: AF NIKKOR 180mm f/2.8D IF-ED "Leni lens"
Exposure: ISO 200, f/11 @ 2.5s, tripod (Gitzo Basalt GT2830 and Gitzo GH2781QR ball head)
Lighting: Window light 
Location: My house
Processing: Lightroom 3, Photoshop CS5, Nik Color Efex Pro

Friday, August 6, 2010

Dying Sunflower #5


I thought this shot was interesting because compared to the side view of a similar flower in Dying Sunflower #3, this angle with identical lighting and exposure does not have anything like the same texture.

Camera: Nikon D700 
Lens: AF NIKKOR 180mm f/2.8D IF-ED "Leni lens"
Exposure: ISO 200, f/22 @ 1.3s, tripod (Gitzo Basalt GT2830 and Gitzo GH2781QR ball head)
Lighting: Window light 
Location: Grand Center Artist Lofts GPS
Processing: Lightroom 3

Monday, August 2, 2010

Dying Sunflower #3


The texture of sunflowers is really something when it starts drying out, drooping and curling.  Here is a straight shot from yesterday, with a dash of bleach bypass from Lightroom to help delineate the fuzz from the leaves and stem.

Camera: Nikon D700 
Lens: AF NIKKOR 180mm f/2.8D IF-ED "Leni lens"
Exposure: ISO 200, f/22 @ 0.6s, tripod (Gitzo Basalt GT2830 and Gitzo GH2781QR ball head)
Lighting: Window light 
Location: Grand Center Artist Lofts GPS
Processing: Lightroom 3

Sunday, August 1, 2010

Dying Sunflower #1, Color Solarization


Last Sunday, on the occasion of the 5th Annual St. Louis City Wide Open Studio Tour, we had our doors open and my brother and sister-in-law dropped by with a lovely bouquet to celebrate the occasion.  This Sunday, the bouquet had ripened nicely and the sunflowers were ready for their close-up.  I planned out the first set for color solarization, marking the first time I shot specifically for the process.  Also a first today, I used my new Gitzo Basalt tripod and head, which performed beautifully.

Camera: Nikon D700 
Lens: AF NIKKOR 180mm f/2.8D IF-ED "Leni lens"
Exposure: ISO 200, f/22 @ 0.6s, tripod (Gitzo Basalt GT2830 and Gitzo GH2781QR ball head)
Lighting: Window light 
Location: Grand Center Artist Lofts GPS
Processing: Lightroom 3 and Nik Color Efex Pro